Showing posts with label How To.... Show all posts

Oh, bring us a Figgy Pudding...

...and a cup of good cheer. Just 15 more sleeps until Christmas!

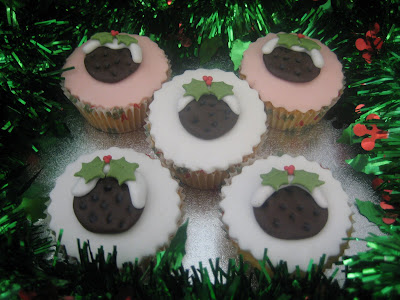
Ok, not quite a Figgy Pudding these are Plum Puddings, although I don't know if they look very different.

Plum Puddings
1. Roll a ball of brown sugarpaste (fondant) and flatten. Press a piping nozzle into the sugarpaste to make currants.

2. Roll a sausage of white sugarpaste and put this over the top of the pudding. Try your best to make it look like the sauce is dripping down the sides. I was thinking you could use yellow sugarpaste for a more custard look.

3. Roll some green sugarpaste and cut to make holly leaves. For big holly leaves you can use a straw. I used a really small 6 pointed star cutter and shaped to look like holly. Add leaves to the pudding.

4. Roll tiny red sugarpaste balls and put on top of holly leaves.

5. Use a small brush to paint black food colouring onto the currants.
6. Transfer to cake when dry.

Flag Challenge

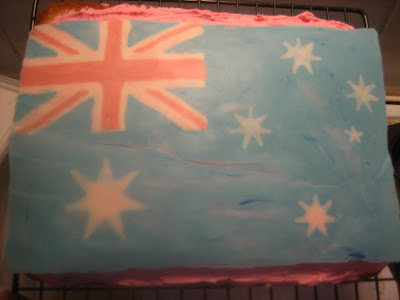
As the title suggests the theme for last weeks Unplug Your Kids was Flag. Years ago I saw a lovely Australian Flag cake which i've been wanting to make ever since. They used strawberries for the red, blueberries for the blue and white chocolate for the white. Well, I didn't make it (stawberries and blueberries, that's just expensive) so I remembered a post I did called Chocolate Polkadot Topped Cupcakes and thought i'd use the same method to do the Aussie Flag (except I used an Aussie Flag template).

Aussie Flag on a Cake


Petal and I spent a lot of time in the kitchen working on this. Making the cake and icing. She didn't do the topper (that was purely my indulgence) so she did a little topper which turned out to be a giant mound of chocolate, yum for her!
If you want to know how to make Chocolate Polkadot Toppers check out my instructions. The instructions are the basic instructions that you'll need and you can make anything using it. I made the flag. Here are photos from making the flag:
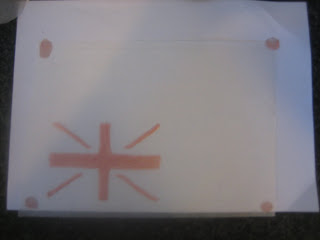
1. a) Under the white piece of paper is an Australian Flag colouring page from coloringcastle.com, they have 23 flags from around the world there. You can use marker to trace the flag on the other side so it's easier to see. I only thought of that after I had made it!!
b) On our Flag, The Union Jack (the red cross thing) is situated on the top left corner but i've flipped the sheet over so it's bottom left, so when you flip the topper onto the cake it's the right way up (hope that makes sense). c) I used parchment paper for this as I needed to see through to the flag template. I secured the parchment onto the paper using chocolate.
2.
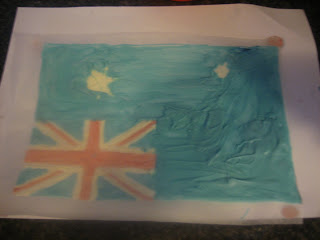
Coming together nicely. I've added the Southern Cross.

3.

a) Now, wait until it sets. I put mine in the fridge for a while (maybe 3-5 minutes) and the paper curved up which made a big crack appear in the middle of the topper. Put the topper in the fridge for no more than 1 minute so it is hard enough to peel from the parchment.
b) I covered the white chocolate stars with the blue but I don't recommend it. The white stars ended up having a blue tinge.
c) Now don't ask my why I decided to have pink icing, I think it looks terrible. I should have done a blue icing to blend in with the flag.


I just 'crack' myself up (okay, bad joke. It's getting late!)

Chocolate Toppers - How to

This is a fun and easy way of making a cupcake, cake or anything for that matter look good.

What I've done so far using this method:
Chocolate Polkadot Topped Cupcakes
Australian Flag

1.

a) What you do is trace around a cookie cutter the size of the cupcake on the back of contact (what you use to cover kids books with) and cut out the circles.


b) If you don't have a cutter the size you want you can trace around your cupcake.
c) If you don't have contact you can use parchment paper but i've found that sometimes the chocolate can slide right off the parchment paper.

2.
a) Put some white chocolate into a cup/bowl and microwave until melted. Sorry, I didn't weight how much chocolate I used :( If you make too much, you can always eat it (that's what we did!)


b) Divide the chocolate into three cups and tint one cup blue and one cup maroon leaving one cup white.


c) I used chocolate colouring which I bought at Spotlight and Kitchenware Plus at Loganlea (South of Brisbane). I'm not sure how gel or liquid colourings would go. Does anyone know?
3.

a) I used a toothpick but you can use piping bags to make dots on the shiny side of the contact.


b) Don't worry if the contact goes curvy.
4.

a) At this point the white chocolate should be cool and not hot. If by chance the chocolate has gone hard put it in the microwave for only a few seconds. Wait for it to cool. Now spread the chocolate over the whole circle.
5.

a) I thought that the topper was firm enough to peel but this is what happened.


b) So I then put my toppers in the fridge for just one minute so that it gets hard enough to make it easy to peel back from the contact and it worked.


c) The end product. Put this on your just iced cupcake (if the icing is hard then this won't stick so well.